Latest Entries »

World’s Tastiest Soup

Dear World,

Hope you had a great Thanksgiving! It took me a few days, but I finally got around to making turkey soup. If you still have your turkey’s carcass lying around, here’s something you can do with it. If you threw it away, do not despair – the World’s Tastiest Soup can also be made with the remainders of a chicken, home-roasted or rotisserie.

You’ll need:

  • one roasted turkey, or the carcass of a roasted turkey
  • 2-3 large carrots
  • one onion, with the peel
  • 2-3 large celery ribs
  • 3-4 garlic cloves
  • peppercorns or ground pepper
  • salt
  • any soup vegetables
  • optionally: rice or pasta

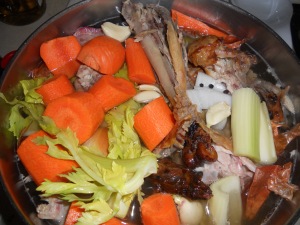
Start by stripping all the meat off of the bones. Whatever you don’t eat right then and their, you can add to the soup later. Place the carcass in a large pot. Chop the onion (wash the skin and add it for color), celery and carrots and add to the pot, along with peeled garlic cloves, peppercorns and salt (one or two big pinches should do the trick). Fill the pot with water, and bring to a boil, then simmer for 30-40 minutes.

When that’s done, turn the heat off, and discard everything (bones and veggies) but the stock. Add about 2 cups of water, and throw in anything you like. I used more carrots and celery, whole wheat rotini, turkey meat and frozen peas. Bring to a boil, then simmer for about 10 minutes, skimming off the fat with a spoon every two minutes. Alternately, if you’d rather, you can simmer the soup for 10 minutes, let it cool, then easily skim the fat, which will have formed into a skin at the surface.

And there you have it! If you need to store it, freezing it in serving-sized tupperware is your safest bet. I will close this post with my first poll: I simply cannot go through Thanksgiving without having thirds of stuffing, so I thought I’d ask.

With love,

– Viola –

How Viola Stole Thanksgiving

Dear World,

After being freshly pressed, I stopped posting altogether. How was I going to outdo myself? How was I going to get thousands (yes, thousands) of views again? Then, I remembered that it didn’t matter. I’m just going to keep blogging the way I do. Just in time for Thanksgiving, I bring to you:

MY THANKSGIVING MENU

That’s right, folks. With the exception of the cranberry sauce, nothing on the table tomorrow will be of my invention. This year, I will trust the experts (Alton, Martha, Rachael, etc.)

WHAT DO TURKEYSHA, MARIE ANTOINETTE AND MADAME MAXIME HAVE IN COMMON?

They all were turkeys of my Thanksgivings past. After I name my turkey (because anything 10 lb or over needs a name), I will BRINE it overnight. This is what makes the turkey juicy and flavorful. *drools* Check out Alton Brown’s recipe here.

When it comes to glazing, however, I will opt for Gourmet’s Maple Glazed Turkey. I can’t believe this gem of a magazine stopped printing! The only magazine that tested every single recipe they ever published! And with the beautiful photographs!

Ok, I’m done now. Check out Gourmet’s recipe here.

GOT GRAVY?

I can’t eat turkey without gravy. It just won’t go down. This year, instead of my traditional white wine gravy, I will spice things up with a paprika gravy,  another stroke of Gourmet genius. The stuffing in this recipe also looks divine. Check out the recipe here.

YES WE CRAN(BERRY)

All my life, I’ve been afraid of fresh cranberries. They are so uncommon in Europe, I didn’t even know what a cranberry looked like growing up! Plus, the stuff from the can looks really neat when you can get it out in its perfect cylindrical shape.

This year, I’m owning my fear: I’m making sauce from scratch! I’ll still buy a couple of cans, just in case things go horribly wrong (you never know). The recipe I found was from Simply Recipes (the photo sold me). Check it out here.

GETTING STUFFED

And now, my favorite part: the stuffing. I used to make three batches of stuffing, the same every year: one with celery and bread cooked inside the turkey, one with celery and bread cooked with turkey giblet broth, and one with just bread and celery, for the poor vegetarians who suffer throughout Thanksgiving.

This tradition of plain stuffing has gotten old, so I will go wild this year with Gourmet’s (again) Wild Rice, Apple and Dried Cranberry Stuffing, which you can find here.

YAM-MA LAMMA DING DONG

Now the sweet potato casserole, I refuse to change. It’s my father’s father’s mother’s (so, my great-grandmother’s) recipe. I usually have a strong aversion to anything labeled “casserole” (tuna, noodle, green bean, you name it), but I’ll gladly make an exception for this one.

You’ll need:

  • yams/sweet potatoes
  • 1 orange
  • maple syrup and/or brown sugar
  • cinnamon
  • nutmeg
  • marshmallows

Peel yams, and cook in boiling water until soft. Mash yams, and mix with some zest and some juice of the orange (start with a little and taste as you go). Add a little maple syrup and/or brown sugar, cinnamon and nutmeg for flavor. Put in casserole dish, and bake at 350˚F for 10 minutes. Top with marshmallows, and resume baking until marshmallows are toasted.
PINING FOR PIE

I am no pie maker, but this recipe is easy and so delicious, no one believes I actually make it! The secret is tons of corn syrup (I know, I know, but it’s so tasty!). For a beautiful illustrated recipe, click here.
That’s it, folks. Happy Thanksgiving! Safe travel and much merriment to all!

With love,

– Viola –

With the Holidays approaching, I bring you first hand advice on how to handle dinner catastrophes with grace and poise, from personal experience.

1. HELP! MY KITCHEN IS ON FIRE!

A classic situation. You only turned your back on the stove for five minutes , and all of the sudden, there are flames and smoke where dinner were supposed to be. The hardest and most important thing is to take a quick second to think. This is no time to react without thinking, trust me. My sophmore year, when my pot roast caught on fire (long story short, I was trying to brown it), my roommate impulsively grabbed the pot and shoved it in the sink, and when she turned on the cold water…yeah, you guessed it. Flames shot up to the ceiling (and left burn marks to prove it!). Thankfully, no one was hurt.

Moral of the story: DO NOT POUR WATER OVER AN OIL FIRE. Instead, cover the pan with its lid, or a baking sheet. If the fire is large, I would go straight for the fire extinguisher. If you can’t put it out yourself, it’s okay. Call the fire fighters. If the fire is electrical, cover with salt or baking soda. NOT LIQUIDS! It’s good to keep a spare pack of salt and baking soda in an easy-to-access spot in the kitchen, just in case. Consider it a very cheap kitchen accident insurance.

2. HELP! DINNER IS RUINED, AND I’D RATHER EAT MY TIE THAN ORDER PIZZA!

Either you just realized you don’t have enough chicken to go around, or the green beans for the nicoise are moldy, or your pot roast turned into boeuf flambe (see above). I’m not a big fan of the scouts, but I do agree with the motto: be prepared!

That’s why I always have a backup plan. At all times, you can find in my kitchen:

  • one or two boxes of pasta – served hot with chopped garlic, olive oil and parsley as a side dish. Or squash, cherry tomatoes, and fresh basil, and call it “pasta primavera.”
  • some kind of rice – it takes a while to cook, but a little rice goes a long way. Goes with most any meat, fish, veggie and sauce.
  • homemade broth – not enough meat to go around? Toss it in a big pot of hot broth, cook briefly and call it soup. Add pasta!
  • canned tomato – last minute pasta sauce, or salsa, or bruschetta topping, these life savers will never go bad!

Of course, it never hurts to think of a back up plan the day before dinner, and maybe spring for a few extra ingredients, just in case.

3. HELP! I DID SOMETHING EMBARRASSING IN FRONT OF MY GUESTS!

Oh boy. We’ve all done that one. Unfortunate gas passing, spilling drinks, dropping dishes, you name it. One that sticks in my head is the first “real” dinner I hosted in my college apartment. Fancy japanese crackers and reisling were provided before the food was ready, and everyone was enjoying the evening so far. I was elated that everything was going so well. When I pulled the chicken out of the oven, everyone oohed and aahed. I was gleaming with pride, until I presented the bird neatly on the table, lifted the knife, and…nothing. I’d never carved a bird before, and had no clue how to do so.

I stood frozen, staring at the bird, knife in hand, perhaps wishing it’d just carve itself. Thankfully, after a couple awkwardly quiet minutes, a guest stood up and said: “Here: I’ll do it.” We all joked that he got to be the “father” for the evening. My boyfriend looked up chicken carving videos on youtube, and we all had a good laugh over the whole thing.

For the record: when you have done something embarrassing, excuse yourself. Then, if your guests found your blunder funny, laugh along. You may not see the humor in it right away, but if anything, you might have broken the ice! If your guests are as mortified as you, show them that you’re in control. Mop up the drink, quickly throw the ruined food in the trash, sweep up the broken plate before they can help you. Smile, joke that no one was severely harmed, wink, and carry on like it wasn’t a big deal. The bigger fuss you make over an accident, the more awkward.

There you have it! I hope this has been helpful. If you have any questions about kitchen disasters, I’m your girl! Just leave a comment or send me an e-mail at violainthekitchen@gmail.com.  Happy Holiday planning!

With love,

– Viola –

My boyfriend has a problem: He’s addicted to eating out.

It’s not that he can’t cook – he’s great in the kitchen! Like most males, he carries the barbecue gene. He knows his way around a pan, and even made up some delicious recipes of his own.

So why does he insist on going out every chance’s he’s got? Laziness may play a small part in it, but I think that mostly, in some way, he enjoys justifying that he can get a good burger and two sides for “only $4.95.” He likes the fact that in NYC, pizza comes for $1 a slice, and that you can get your fill of nitrate (hot-dogs)  at any street corner from a cart. I’m not saying that eating out is always unhealthy, but he certainly doesn’t go to a restaurant for the salad, if you catch my drift.

This has caused some strain in our relationship, as I hate eating out. Why pay $16 (including tip) for a dinner that could have cost me $5 to make at home, turned out healthier, tasted better, served on my own china with my own silverware, and included a glass of wine?

So, we agreed to compromise. Burgers, chili, pizza and pork rolls are still a part of the diet, but now they’re homemade. We haven’t stopped drinking altogether, but we keep the liquor cabinet stocked, instead of barhopping (for which we are too old, anyway). But I can’t eat this “man food” every day, so I had to come up with something else to keep my honey out of the fast food joints.

Yesterday, I did something new: instead of asking the usual “what’s for dinner?” I wrote out the “Menu du Soir” on the dry-erase board. I grew up in one of those tiny European countries near France, so I speak fluent french. Using the fanciest, fruitiest terms I could think of, I wrote out the menu I had in mind:

*Asperges au four, avec un fin filet d’huile et parsemées de gros sel*

*Blancs de poulet à la panure poivrée*

*Compote de pommes chaude au miel*

Even if you don’t know how to say half of the words, doesn’t it sounds so much more appetizing (and a bit snottier) in french? The menu translation is as follows: roasted asparagus, with a thin trickle of oil and coarse-grained salt; chicken breasts with peppered breadcrumbs; hot applesauce with honey.

It did the trick, and helped feign the illusion of a ritzy frog-leg-serving, mustachioed-waiter-harboring establishment, rather than our boring old kitchen. It took a lot of energy to be the chef/sous-chef/waitress/busgirl all at once, so I’ll still let my beloved carnivore fix sloppy joes and franks three or four nights a week, but it’s nice to treat him to his “restaurant outing” without paying the salty (hehe) bill.

For the avid cookers out there, here are the recipes of the night. For applesauce recipe, refer to previous post.

For the chicken, you’ll need:

  • chicken breasts (1 breast per person)
  • All purpose white flour (enough to cover the breasts)
  • slightly beaten eggs (1 egg is enough for about 4 breasts)
  • enough bread crumbs to cover the breasts (I bought mine plain, and mixed in some salt, pepper, garlic powder, onion powder and dried rosemary)
  • olive oil

Pre-heat your oven at 350˚F. Rinse and pat the breasts dry, and roll them in the flour.

Then, roll them in the egg.

And then, in the bread crumbs.

Generously coat the bottom of a large frying pan with olive oil. Heat the pan on high, and add the chicken (if you’re fairly new at frying, I would only do one breast at the time).

When the breasts are browned, transfer to a baking sheet covered with a sheet of aluminum foil, and bake 10-15 minutes, or until the breasts are done. COOKING TIP OF THE DAY #1: To check if chicken is fully cooked, make a small incision. If the juices run clear, the chicken is done. Also, the inside should be white, not pink. DO NOT EAT UNDERCOOKED CHICKEN! Serve warm!

For the asparagus, you’ll need:

  • a bunch of asparagus
  • coarse-grained salt (regular salt is okay)
  • olive oil
  • pepper

Preheat the oven (or your toaster oven, if you have one!) to 420˚F. Get rid of the ends (opposite of the yummy-looking tips). COOKING TIP OF THE DAY #2: The easiest way to get rid of the “bad ends” is to snap them off with your bare hands. Just put your fingers at the base of the spear, and snap wherever it’s the easiest – that’s where the tough, stringy part stops and the yummy, tender part starts!
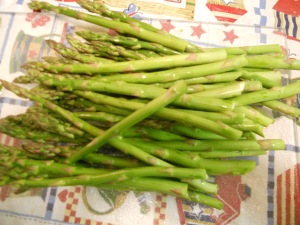

Arrange the spears on a baking sheet covered with aluminum foil, and drizzle some olive oil on top. Sprinkle with salt and pepper, and roast for 10 minutes. Bon appétit!

This morning, I tried a second time to make protein powder pancakes. This time, they were neither oozy nor gooey, and not so hard that you could sit on one without squishing it. But they were still very tough and hard to swallow.

Irritated and upset, I needed to cook something that would taste good. There was a bag of bruised and overripe apples on the table, and with a cheerier disposition (apparently, rotten fruit makes my day), I started making applesauce.

You’ll need:

  • 6-7 big apples, all of the same or mix & matched (a little overripe/bruised is ok, maybe even better!)
  • 2 cups water
  • honey or brown sugar (let’s say 1/3 – 1 cup)
  • cinnamon (1 stick, or 1 tbsp ground)
  • nutmeg (1/4 tsp freshly ground, or 2 tsp ground)
  • cloves (6-10 whole, or 1 tsp ground)
  • optionally: rum or brandy
  • optionally: raisins

Peel and chop apples into little pieces. Cooking tip of the day #1: An easy way to remove the core is to quarter your apples, then cut the quarters in half. The little triangle of core is easy to cut out.


Place the apple bits in a medium-large

saucepan with about 2 cups of water, and

cook on high heat, stirring frequently.

When the mixture starts bubbling, bring

down to a simmer. The

water will thicken, and the apples will get mushy.

Eventually, your apples will look like this:

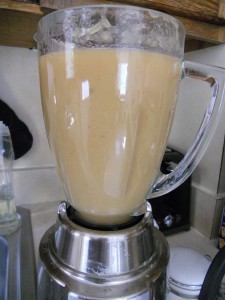
When they do, turn off the heat and let them cool for 5 minutes before transferring to a blender. Blend only for 10-15 seconds. If you like your applesauce on the chunky side, only blend half of the apples.


Return blended apples to the saucepan, add about 2 tbsp rum or brandy, the spices, and honey or sugar (start with just a little, and taste as you go). The rum/brandy is optional, but it improves the taste, and all the alcohol gets cooked away anyway. Any kind of mulling spice goes nicely in applesauce.


Simmer for 5-10 minutes, and eat hot or cold! It smelled so good, that Sebastian, Fabian and I decided to have a hot applesauce degustation. The boys were very engrossed in some stupid video game they were playing, but I did get a positive review from Fabian without having to fish for it (as opposed to certain boyfriends, who just keep shooting imaginary foes instead of joining the real world).


Tasty variant: add raisins to the applesauce after you cook it (raisins get bitter when boiled in the sauce). Though this sauce tastes great on its own, it also goes very well with yogurt, pork chops, latkes and ice-cream.

That’s it for now! Happy daylight savings day! Enjoy the extra hour.

Love,

– Viola –

Failed Pancakes

Stuffed butternut squash. 3-bean chili. Zucchini fritters. Layer cake. For weeks, I’ve brought you fail-proof, home-tested, mouth-watering recipes. But it wouldn’t be honest to tell you that it always all turns out picture perfect. While I do luck out often, I undercook, mix measurements, and also have a horrible tendency to carbonize things on a regular basis.

This morning was one of those mornings. Sebastian and I had gone to the gym on an empty stomach and were cranky. I wanted to make protein powder pancakes, but couldn’t find the recipe I was looking for. After an hour of searching, I decided to make up my own.

The first two batches of silver dollars came out so tough that I could bang them on the side of the table without breaking them. So I added some milk to the batter, and the following batches came out liquid in the middle.

From left to right: Cement, Toughie, Oozy & Gooey

Sebastian was nice about it. He doused a couple of the rock hard ones with syrup and somehow managed to chew and swallow. And said that they were “fine.” Now, that’s love.

I’ll let you know when I find that good recipe for protein powder pancakes.

Stuffed Butternut Squash

Every Wednesday night, Sebastian, Fabian and their friend John gather in the basement and play batá drums (no, they’re not santoria, they just like the music). I’m living with heathens (and loving it, as long as they’re done by 11 PM).

So, every Wednesday night, I try to cook up something tasty for the boys. Tonight, since I had a squash lying around and some ground beef in the fridge, I decided to make stuffed butternut squash. I didn’t have a recipe, nor did I find a good one on the internet, so I kind of made up my own as I went.

I used:

  • 1 medium butternut squash
  • 1/2 – 3/4 lb. ground beef
  • 1 large carrot
  • 1 celery stalk
  • 2 cloves garlic
  • 1/3 of a small yellow onion

Preheat your oven to 360˚F, and cut your squash in half the long way. Cooking tip of the day #1: When slicing a butternut squash, it’s easier to start at the fat end. Scoop out the seeds and strings, and rub some vegetable or canola oil on the inside of each half. Put the halves face down on a baking sheet lined with parchment paper, and bake for 20 minutes.

While the squash is baking, mince the carrot, celery, onion and garlic. Over medium-high heat, toss 1 tbsp olive oil and the onion in a big pan. Add the beef, carrot, celery and garlic. Salt and pepper, and cook until lightly browned before removing from the heat.

Uh…the beef is not browned in this picture. But it’s the only picture that came out ok. Sorry!

Anyway. Once the squash has cooked for 20 minutes, flip the halves over, and fill the cavities with the beef (I had to dig out some of the butternut flesh to make room). Bake for an extra 20 minutes. Serve hot!

Happy Halloween! (Yes, I know Halloween was yesterday.)

It was a nice, quiet celebration. Sebastian and I dressed up, and had a couple of friends over. It was our friend Emilia’s birthday, so I took it upon myself to make a pumpkin cake with caramel cream cheese frosting. It was delicious!

You’ll need:

  • 3 cups all purpose flour
  • 2 teaspoons baking soda
  • 2 teaspoons baking powder
  • 1 teaspoon cinnamon
  • 1/2 teaspoon ground ginger
  • 1/4 teaspoon ground cloves
  • 1/4 teaspoon freshly grated nutmeg
  • 1/4 teaspoon ground allspice
  • 1/4 teaspoon ground cardamom
  • 1 15-ounce can pure pumpkin
  • 1 1/2 cups sugar (I used 1 cup brown sugar and 1/2 cup white sugar)
  • 1 1/4 cups vegetable oil
  • 4 large eggs
    2 teaspoons finely grated orange peel

Preheat your oven to 350˚F. Grease and flour two 9 inch cake pans. In a medium bowl, mix the flour, baking soda, baking powder and spices. In a large bowl, beat pumpkin, sugar and oil with an electric mixer. Add the eggs one at the time, and the orange peel, beating well. Turn the mixer to low, and slowly add the flour mixture. Mix just until homogeneous. Divide the batter equally in   the pans, and bake for 30-40  minutes, or until an inserted  toothpick comes out clean. Cool the cakes in the pans for  10 minutes, then remove from the pans (I turned them  upside down on plates) and cool completely on a rack.

Now for the caramel cream cheese frosting!

You’ll need:

  • 1/4 cup light brown sugar
  • 10 tablespoon butter, divided
  • 1/3 cup heavy whipping cream
  • 8 ounces cream cheese, softened
  • 1/2 teaspoon vanilla extract
  • pinch of salt
  • 1 3/4 cups powdered sugar

In a small sauce pan, melt the brown sugar and 4 tbsp of the butter over medium heat. Stir until sugar dissolves, and bring to a boil. Remove from heat, and whisk in the heavy cream, blending well. Transfer to a heat-resistan bowl.

While it cools to room temperature, beat the remaining 6 tbsp of butter and the cream cheese in a large bowl with an electric mixer until smooth. Add vanilla and salt. Turn mixer setting to slow, and slowly pour in the cooled caramel (brown sugar mixture). Add the powdered sugar gradually, beating well after each addition until completely smooth. Refrigerate until firm enough (a runny frosting will leak), stirring occasionally.

And now for assembly: the fun part! When the cakes are cool and the frosting is a good texture, cover the top of one of the layers with frosting.


Delicately, with the help of a spatula, put the second layer on top of the first. Frost the top and sides of the entire cake. For an extra Halloween-y touch, I decorated my cake with candy corn.

This may have to be a repeat for Thanksgiving!

When I think of pasta salad, I think about those depressing potlucks: tables laden with potatoes swimming in mayonnaise, industrial quantities of supermarket taboule, and at least five different pasta salads made with (ick) three different colors of rotini. Everyone precipitates themselves on the bite-size pigs in a blanket, before pushing the rest of the food around with their forks, telling every guest that “their pasta salad is by far the best,” and that they “couldn’t possibly eat another bite.”

This pasta salad is different. My dad made up this recipe, and it’s delicious!

You’ll need:

  • cooked pasta, hot or cold
  • 1 can of tuna (per half box of pasta)
  • cucumber and/or celery, chopped
  • 1 can of corn
  • sriracha
  • onion powder
  • 2 garlic cloves, chopped, or garlic powder
  • pepper

Cook the pasta as instructed on the box and drain it. Mix pasta with the rest of the ingredients in a big bowl. I wouldn’t add cucumber if you’re having a hot pasta salad. If you’re having it cold, add a dash or two of rice vinegar. If you’re having it hot, you might add a little olive oil.

That’s all there is to it! Oh, and let us all make an effort together, and stop bringing pasta salads to potlucks. Veggie trays are a better alternative.

Love,

Viola

Because they’re from Hamburg. Well, not really.

I’ll leave you to argue about that, and give you the recipe! The measurements I gave you may seem flaky, because I just eyeball the ingredients. Hamburger is not rocket science. Puff pastry is rocket science. You can’t ruin ground beef.

You’ll need:

  • ground beef (1/4 pound per burger)
  • some chopped onion (about 1 cup per pound of beef)
  • oatmeal, quick or old fashioned (about 1/3 cup per pound of beef)
  • egg (about 1 per pound of beef)
  • any seasoning you like: garlic cloves, garlic salt, pepper, salt, lemon salt, bbq sauce, soy sauce, Worcestershire sauce, chopped green pepper, green onions, thyme, rosemary, curry powder, cayenne pepper, chili powder, anything!
  • buns, if you’re a bun person (I like my burgers nude)

Combine beef, egg, oatmeal, onion (minced) and seasonings of choice (I went for chopped garlic cloves, Worcestershire sauce, salt and pepper) in a medium bowl. Hamburgers have more soul if you mix with your hands, so don’t be a sissy. Form into patties as small/large as you want (1/4 pound to 1/3 pound is a good serving).

Cooking time. Sebastian insists on using the cast iron grill, which is a pain in the ass to clean, but healthier (drains out all the fat) and gives better results. Because I HATE cleaning cast iron, I just use a regular pan. Heat it up, spray with a tiny bit of olive oil, put patties on the pan (this would be a good time to brush them with your favorite BBQ sauce, if you wish) and cook for 10 minutes on one side (no flipping!), or until they look like this:

Flip and cook 5-10 minutes on the other side. Sebastian is a cheeseburger kinda guy, so he adds a slice on his patty right after the flip. We’re not bun people – we usually use whole wheat wraps, but tonight was a nude-burger night, and even then he couldn’t finish his third pounder! Here‘s the beef.